Life story - the short version


I'm a fun loving 30 something year old . Married my favourite guy. Started on my production of children & number 1 is an adorable boy. Big on family. Big on craft. Love country music. Love fuss free + practical ...aaand maybe with just a little bow for decoration!

Love the law of attraction too. And singing ...dancing ...bright colours and excessive punctuation ...and stationery.

Friday, December 28, 2012

FMQ practice on teacups

Next on the calendar now Christmas is done, is to have a baby. Schedule:whenever baby 2 is good & ready.
My good friend is coordinating a high tea get together to celebrate the impending birth.
She would've loved our second babies to come in the same year, and there's still time for 2013, but for argument's sake we were pre naming them Thelma & Louise!
She made the baby a Christmas gift. Isn't it adorable?


I'm making some tea cup pouches, hoping they'll be done in time so the afternoon tea guests get to take one home each :-)
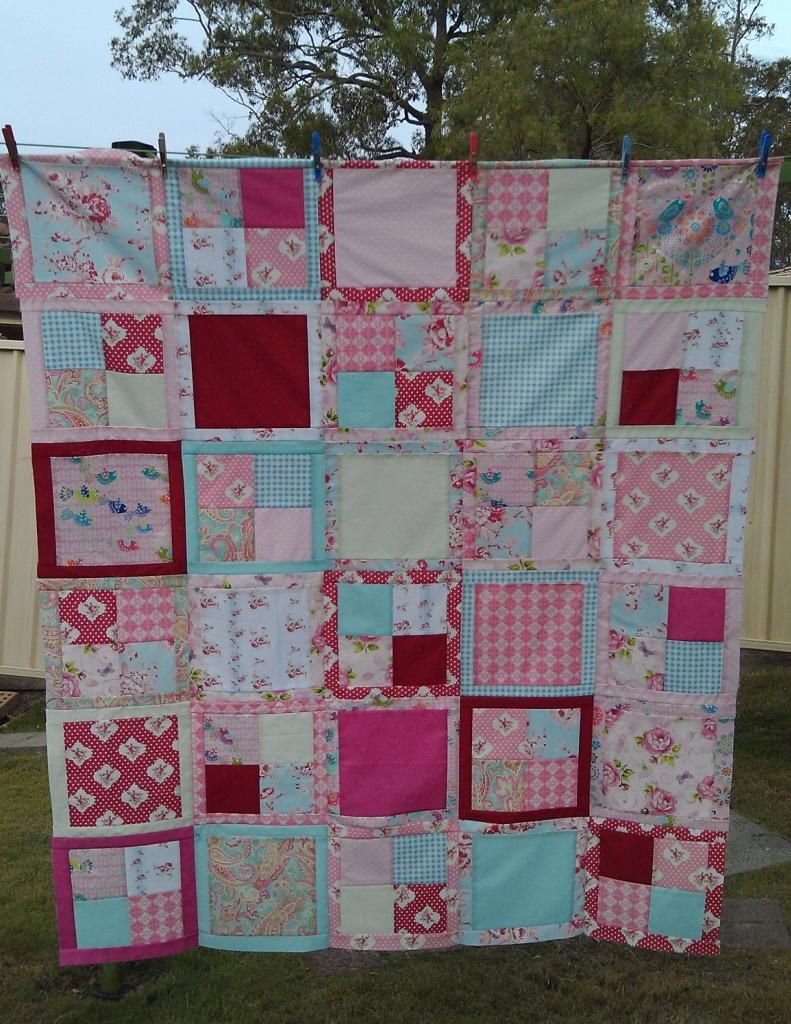
It's good free motion quilting practice.
Here are some I've quilted, to show you my quilting.


Isn't this fabric (hope cove) just divine? I love it.


I love this Anni Downs fabric called my favourite things, I had to show u both sides of the teacup!


posted from Bloggeroid

Wednesday, December 26, 2012

Felt shooting stars - free tutorial

I have made 10 of these inexpensive shooting stars for little ones in my circle.

They're kind of addictive, and really easy and quick. Let me show you how I made them....

MATERIALS:

  • About 40cm each of 5 ribbons (or more than 5 and varying lengths!)
  • Two pieces/scraps of felt over 10cm square (or fleece would work too)
  • Contrasting thread
  • Filling - I used long grain rice. Mine took about half a cup each to fill.

METHOD:
1. I began by cutting out a star template (using a piece of cardboard which was ready to go into the recycling bin) about 10cm at the widest point.
Mine wasn't perfect, once they are stuffed it hides your dodginess a little hehe
2. Trace your star shape onto your top piece of felt. It doesn't hurt to mark a start/stop point (now) to make sure you remember to leave an opening for stuffing. I recommend leaving open a whole "valley" between two points.
3. Embellish the front with any personalisation before the next step
4. Prepare your ribbon lengths together to create a tail. I simply pinned mine together near the top.
5. Sew the front piece of felt to the back piece (right sides out, you won't turn through), ensuring you have the ribbon tail in place at the bottom, and leaving the stuffing opening.
6. Fill with rice or other heavy filling, sew opening shut.
7. Cut out the star and let the kids chuck it about!

A friend told me she cut out the stars first, and then sewed them. She used straight stitch which would be even faster.
But I like to sew first, fill, then cut. It's the perfect excuse to use those fancy stitches you never get to use, keeping that rice in nice and tight, and if you use *my favourite* variegated thread it shows off more, the wider the stitch width! Less room for error sewing off the side by accident too.

If you make one (or 10! or more!) please email me a pic to cass@cassthecoolest.com or put it on my facebook wall, I'd love to see it! I don't care if it's a midnight pic using a flash - how else do we sew for the kids hehe.

I would recommend it from ages 18 months to about 3 and a half - older if you want to play piggy in the middle or something!?

Sunday, December 16, 2012

New logo & a completed quilt top for sharing

So excited, I got given a new logo by my bestie who runs Virtually Perfect as an awesome office assistant and webdesign and the whole sh'bang!

What do you think?

and she made one for my facebook cover too.

I just had to share because they're SO cool, I can't get over it.

While I'm here I'll show you a quilt top I don't think I've shared. Finished in October (2012), it's for my husband's brother's girlfriend, Hannah.
The original intention was to finish it and send it to her while she's staying in Austria to remind her of all of us. But seeing as postage is so expensive from Australia to Austria, and they are travelling about anyway, I decided to keep it at home in the end.
It's probably the girliest quilt I've ever done. I used a pattern from the book Think fast, by Swirly Girls Design that I bought from Blueberries, my LQS.
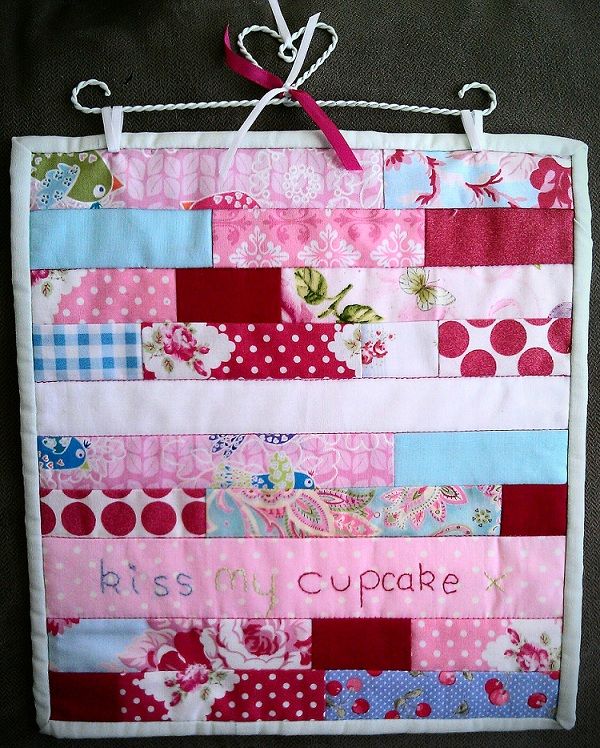
Meanwhile, in our town a cupcakery opened and I used the cutesy scraps to make a little wallhanging for the owner, Melissa, as a little gift. She made the cake pops for my 30th birthday and her creations are so delicious.
Kiss My Cupcake, 1 Alison Rd Wyong

Thanks for joining me XO
Cass

Saturday, December 15, 2012

Back to the BOM


I began a BOM (block of the month) quilt kit when my almost 2 year old was only a few weeks old. Or maybe before that? Anyway, it was 12 blocks, 12 months. Yes, I know it's been more like 20, but I'm still working on that final block lol.
Any sewist will know that projects get moved around on the priority list (and I have a tub of things I once started). BUT! I got my final block out again this week, after finishing a quilt top for my friend who got married this year. (U like it?)


I designed it to make the most of a fat quarter stack a friend gave me. The triangles were supposed to look all uneven but I'm so anal I had to make them all 45 degrees and 60 degrees. So now they just look like bad seams. Ah well.
Anyway, I'd embroidered the word that goes in the final block, so I thought I was further along in progress than I was.
Albeit disappointing to find I was at the beginning, familiarising myself with the block reminded me of how much I had a crush on the fabric range and I fell in love with it all over again.
I wrote this whole blog post yesterday, but in the cyber trip from my phone to the net it didn't survive. The good news is I've already fused and sewn much of the block in the meantime. Next stop is three Ohio stars which I like the look of, but don't really like the constant need for pressing and cutting a bunch of pieces. Anyway, [thinking positively], they're the last ones I'll have to do for a while.
It just so happens that we get our new bed tomorrow, so I will need to get this quilt finished and soon display it on our new bed!!
~~
I'm really excited because two close friends are getting new sewing machines for Christmas!
Mums is an upgrade, and my bridesmaid is beginning to wonder what hit her in the sewing world as it's her first ever machine!!
She is so excited, she is already planning blogs and pages and logos for sharing her creations. I can't wait to share more details with you, but I'll simply have to.

What else I've been up to......
I've been updating with brief sentences and photos on my facebook page rather than blogging. If you're on Facebook, be sure to join me and hopefully I will make you laugh with something relatable or a crafty picture!

Other finishes:


I made a bunch of rice filled shooting stars for my mother's group friends


I made this adorable quilted teacup pouch using an instant download pattern from patchwork pottery. I want to make more, aren't they cute?!


Some fleece shapes filled with rice for my family currently travelling Europe. 25sec in the microwave and these will help keep fingers toasty inside jacket pockets on those days where the weather forecast begins with a minus symbol!


Here are my friends from Wyong Patchwork & Quilting enjoying the festivities.

Merry Christmas guys, and all the best wishes for 2013!

posted from Bloggeroid