Life story - the short version


I'm a fun loving 30 something year old . Married my favourite guy. Started on my production of children & number 1 is an adorable boy. Big on family. Big on craft. Love country music. Love fuss free + practical ...aaand maybe with just a little bow for decoration!

Love the law of attraction too. And singing ...dancing ...bright colours and excessive punctuation ...and stationery.

Showing posts with label sewing. Show all posts

Tuesday, January 22, 2013

Singlet tales. From candy canes to trains.

On Christmas eve I realised the Santa t-shirt I intended to dress my 22month old son in was going to be too hot.
As any sewist would, I set about making something suitable an hour before we are due to arrive LOL.

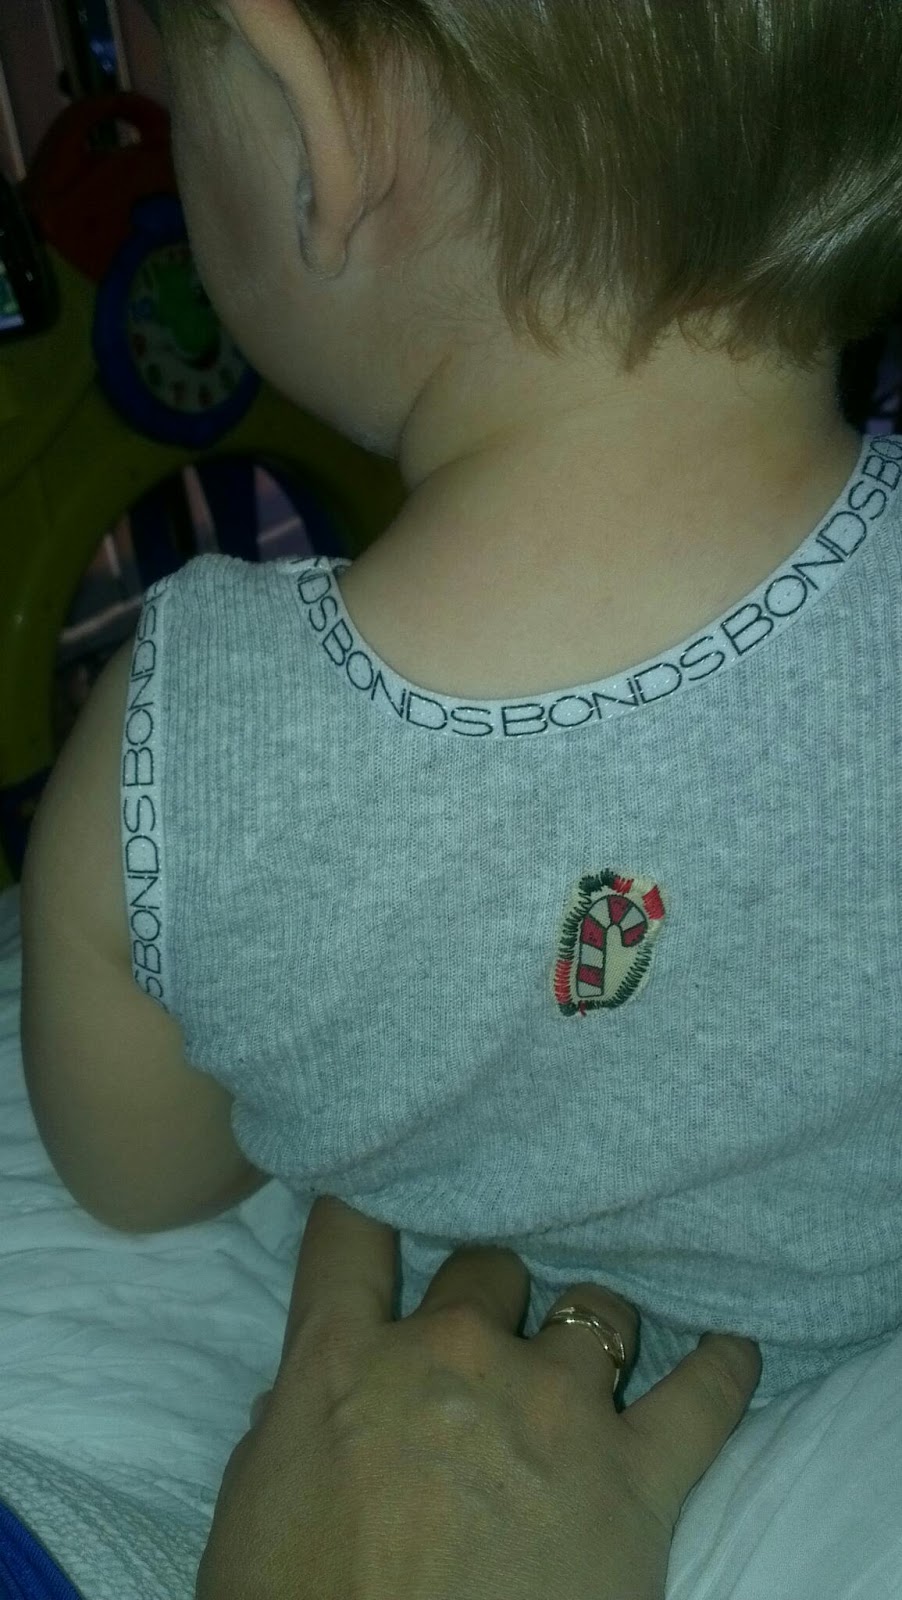
I've included a pic of the front and of the back,  with teensy little Christmas appliques.

That was very short lived due to being made within hours of Christmas. So yesterday I decided to unpick those appliques and replace them.
Recently I ruined a Chuggington shirt in a wash cycle too hot for the poor chuggers, but the patch on the sleeve was fine. So I used it on the singlet and prepared for my son to fall in love with it....
However, seeing as he can't read, he doesn't recognise it's Chuggington and was not at all excited lol. Oh well, one day the penny might drop!

Sunday, January 20, 2013

Big boy bed quilt just in time

My son was moved from his cot to a single bed just before Christmas. Seeing as his little brother or sister is due today (yup, not born yet) it was on the cards anyway, and when I saw his foot reached over the top bar of the cot I could wait no longer.

I had started on a quilt with his name after he was born, but somehow miscalculated and ended up with some rows not the same width as others. Needless to say it was relegated to the ufo tub. I was told it was better to finish a dodgy quilt made with love than to leave it incomplete.

When I bought a quilt kit for this next baby at the Sydney show, I figured I couldn't start it til I'd done the quilt below.
I've said it before, but I thrive on deadlines!
So I'm hand sewing the binding down on my due date, and I can begin the quilt kit for the new baby tomorrow hehe.

I realised I have recently completed FOUR quilt tops, but the last time I quilted anything was for the Wyong show in April 2012!
I was nervous to get started again and my straight lines are anything but straight. I just had to pull on my big girl knickers and get on with it.

I kept forgetting to watch when the quilt needed rolling in the throat of my machine. With the feed dogs down no mistakes go by!
So I went back to rounded and moving stitches instead and this turned out much better!
It's probably totally amateurish to quilt with so many types of free motion designs all on the one quilt, but it was fun so who cares?

Scallops are probably my favourite free motion quilting (FMQ) shape.

Too difficult to photograph but I did "pebbles" all through this part of the castle.
I'm much better at meandering than straight free motion, as you can see.

It's the size of his mattress, and no wider or taller.

Fit for a King!
Thanks for dropping by!
Love Cass

Sunday, January 13, 2013

Misguided nesting - baby sprinkle day

My husband has been hoping the nesting instinct would kick in so the "spare room" which was mostly filled with fabric, notions, trims, and tools might begin to look inhabitable by the new baby!

Well, I was preparing for the new baby, but my nesting got a bit misguided and turned into quilted teacups for the celebration of this baby's birth with my sisters and close friends. A high tea, affectionately named by my bestie as my "Baby sprinkle". Not quite a baby shower seeing as it's the second baby, but somewhat the same.


I told you about these and began showing you, but it's today and they're all finished! (ok, if you're a sewist you probably know that's a lie, there are three tea bags that don't have the word "tea" embroidered onto them, but "finished" as they're probably going to get haha).


Here I am this morning finishing some embroidery on the last tags whilst waiting to go.

I love them all, seeing as I made each one unique. I decided I'd show every single one:


Just a reminder I bought the pattern from Patchwork pottery, here US$12. It's a little fiddly so I wouldn't say suitable for beginner, but if you've ever sewn a zip before you're experienced enough.
FYI I also found these cute play tea bags yesterday

and pinned them but the post isn't in English so you just have to make it up yourself I think.


Here's my idea of "hand sew the opening closed" haha. Too lazy for that, it's in the lining anyway pfft! Brother NS20 to the rescue!
Getting pretty good at those zips after churning out ten in short succession. Just sayin'.

Top quilting is 'daisies' on the picture above.
This quilting's kind of 'steamy'
This was my first one and I don't like it much but it was popular today. I *do* like the blue ricrac though :)
Some meandering quilting.
This quilting's kind of pebble style. I loved getting to use my decorative stitch on this blue ribbon.
More pebble quilting and another decorative stitch used.
Love hearts in the red, using variegated thread. The leaf pattern stitch was a bit lost in white on the gingham ribbon, but I still love this country cup pouch.
This divine fabric by Robert Kauffman (I believe it's called Florentine or Florentine 2 3 or 4) stole my heart, if I could use only 3 fabrics for the rest of my life I think this would be one of them!
I followed the fabric's lead when quilting this one. "Oh fabric, take me away!!"
Above is the scalloped quilting which was easy and effective, and I got to use some cute trims I've had for years, on the ones above and below.
And Danielle brought all these goodies to fill them for each guest:
And made this adorable canvas for baby's room! Thank you!


Until next time, wishing you lots of stitching time.
Love Cass

Friday, May 25, 2012

Pulling out the archive projects


I've done all the machine sewing on my current project and decided to brave the incomplete project pile for something to jump into shortly.
I found this quilt I began when my son was born. But as you can see, I had plans to make it wider and didn't know how to tackle my half baked plan.
It was going to be a single bed size, so even though it's been collecting dust, I'm not that far behind schedule :-)


On another note, I realised I hadn't shared a nice photo of my bedrunner.


I fell in love with the tiger panel at Rosehill Craft Show when I saw it at the Barossa Quilt store stand. I had all these images of Peggy Bundy's ugly style, and a bunch of proverbial women on my shoulder saying "Really!?? Tiger print??!".
Nevertheless, I bought it.
...and I'm still stoked I did.
With this freezing weather it's piled on top of some totally mismatched quilts on my bed LOL but when it's not ice cold, it will complement my pretty plain bedroom.


I quilted it very minimally. I'm still new at free motion quilting and this was one of my show quilts, finished on the due day. I just did squares around the centre panel in black to secure it, then tried to follow the fur to quilt the tigers on each side.

Have you tried free motion quilting? How did u find it?

I wish I didn't do that line down the centre, but the rest I think I did really well.


posted from Bloggeroid

Wednesday, May 23, 2012

Wanna hear somthing funny?

Yay for me I got my new extension table!!
(...that's not the funny bit)

My little brother-in-law and his lovely girlfriend bought it for my birthday recently. Lincraft ordered it in, and said they would call him when it arrives.
Apparently I am well known at the local Lincraft (although I visit Spotlight and All about sewing more than Lincraft) because they were all "We're so sorry that Cass' table hasn't yet come in" and "Do you know Cass' rewards card number?.... It's ok, her last name is in here let me just search for her, yep points counted!"
I think it's hilarious because my brother in law relayed all this to my husband when he handed over my extension table. It's like they've only just found out I've got this huge penchant for sewing and who can believe Lincraft staff know who I am before my name is even mentioned LOL.
I think he must have been dealing with the girl I wrote a positive letter about after she sold me my beloved Brother NS20 (I wrote about it here) because she would probably remember my name, but I don't know about any of the other staff members.
My husband wasn't all that surprised to hear how well they know me, though hehehehe.

On my table today:
I've just finished one little 4 inch block (of five) which will be part of a wallhanging for Quilting Mumma's son's birthday

This was really fun (although I took the long way about it, dragging it out). I got to use up some batting scraps, and I have always loved that blue argyle fabric. Plus, who doesn't love stripy binding!
Found those super-suitable buttons in spotlight by chance, used my new genuine stippling foot to machine around the letters and am just loving it from start to finish :-)

Friday, May 18, 2012

The brown bag story


I'd bought this brown fabric, and aqua toned fabric in an 'anti-wrong-fabric-choice' rampage within the last year, intending to make a baby bag.
Here's my problem though. I have an awesome Kapoochi baby bag which has pockets for EVERYTHING including hidden ones (for secure items) I didn't even realise were there for 6 months! To make something adequate I would have to raise the bar SO high it became unattainable.

But now my son is over one year old, and I'm the only Mum I know still carrying around panadol, change mats, hats, spare clothes, and everything else, most places I go "just in case".

I'm one of those people who has always had a MacGyver handbag. You know, if I were stuck in an broken elevator I would probably have something suitable for opening the door, saving everyone on board the elevator and anyone in need of a pen or a nail file in the meantime.
So it's difficult for me to downgrade to a smaller bag.

I don't often fall in love with "handmade bags", and I instantly cringe at the word "tote" 'cause I'm simply wayyyy too cool for that... or at least that's some kind of left-brain/right-brain message happening in my life.

However, when I saw the reversible bag pattern in Stitch magazine (Summer 2012) I could picture it in my perfect fabric choices.

Despite having some ridiculously large metreage of this fabric, I cut into it and got started!
It began with this:

Which turned into the inside... (note the fabulous decorative stitching around the top, yes, leaves on leaves, it's so quaint and I *love* having decorative stitches!)


One day I'll add buttons, sure, but it's the first step to letting go of the baby bag.
What do you think?

Thursday, May 3, 2012

And only 3 little ducks came back.


Well... I got 3 quilts done in 8 days. Not the complete set of four I'd intended, but not a bad effort.
The above height chart is clearly still in progress. Sadly it won't make the show, but I'll still finish it off tonight or tomorrow anyway.
I am so thankful that my sister Angela came over with no prior notice. She kept Lars busy and entertained, but not only that, she took him for a walk, did washing for me, made my bed and washed up!!
Maybe I should enter quilt shows with unrealistic timeframes more often LOL.

It took longer than I thought because the quilts all needed sleeves and labels, which I seldom do.

It was a good experience. I think I've kept the judges guessing because my quilts are three TOTALLY different styles, and each has a different loft and wadding!


It was testing, to go from craft wadding on the left, to quilt lite on the right. I've decided I like my quilts thick, so I'll tend to lean toward the lofty polyester in future most probably.
The other quilt which I didn't get a chance to photograph was bamboo.

The three styles were pretty traditional squares on point, (not really a good use of light & dark though), tiger panel bedrunner, and a modern jelly roll square in square with hidden stars.


posted from Bloggeroid

Thursday, April 19, 2012

How to buy the right quantity of fabric and design your quilt GUEST POST From Quilting Mumma, Allison


If you have read a patchwork magazine released within the last few years you have probably seen a quilt or two, designed by the lovely Allison Nicoll, AKA Quilting Mumma.
Above is one of the latest publications she is featured in, and she has been absolutely pivotal in my quilting journey. In my sewing journey blog I explained that youtube was the teacher of much of my patchwork as it was the Christmas break when I got "the bug". But where Ally comes into my life so that I could complete my first quilt is a whole separate blog, coming later this month. For now, I wont rabbit on about myself, for this blog is about Ally imparting more knowledge (to you)!

Having worked in a number of sewing stores, she has a wealth of patchwork knowledge to share.
When I asked her how she can calculate general requirements for a quilt so quickly, I realised that I'm sure there are others out there wondering too. So she so kindly wrote this guest post for us..... [enjoy]

Hi everyone!
My name is Ally and I’m the designer behind “Quilting Mumma”. Thanks SO much to the lovely Cass for asking me to do a blog post here for all you lovely peeps!

So Cass wanted me to chat with you guys on “how” I go about designing a quilt.

I don’t have one particular way that I use all the time, I guess it varies depending on what fabric Im using, who the quilt is for etc etc. But basically I will give you a few tips and tricks that l find work for me

  • Its ALL about the fabric for me.... I will often find myself designing a quilt pattern in my head just from seeing a piece of fabric that makes my head all giddy!

    As a general guide, I tend to use:
    • A fat quarter selection of a few main prints (Approx 8-10 fat quarters),
    • Then I team them with a solid colour/s that will match.
    • Add 1 yard/metre for border
    • And ½ yard/50cm for binding and I’m good to go!
  • I also LOVE pre cuts this is a great alternative if you are time poor or are not that confident in matching up prints. I will often use a jelly roll or layer cake.
  • I generally will only make lap or throw size quilts as I like to quilt them myself on a domestic sewing machine.
So there you have it, I guess the thing that I want to really point out, is to HAVE FUN! Quilting is something that makes us happy, so go with it and enjoy the time you spend stitching. Dont sweat the small stuff, accuracy is something that comes with practice, and if your seam is out by a smidge YOU are the only one who is going to notice. Be sure to check out my blog... quiltingmumma.com Spend some time today doing something that makes you happy!
Quilting Mumma xxx


For inspiration on block patterns to make up your quilt, go to quilterscache.com/QuiltBlocksGalore but don't say I didn't warn you, there are A LOT.
Love Cass

Wednesday, April 18, 2012

My Sewing space

I like to gawk at other people's sewing rooms, so I thought I might share mine with you!
Plus, I have some ideas that I now would never do without. Can you see something I can improve? Let me know if you like any of my ideas and if you adopt any into your sewing space! I'd love to hear from you whether your sewing space is packed away 90% of the time or your house is small compared to your sewing room!

The storage space


Some of my fabric storage...
The top box contains all my wadding, interfacing, pellon, fusible web, toy fill, and some calico.
Under that is a drawer full of patterns, with my rulers stacked on the left.
The next double drawer is notions and tools that don’t fit in my “fasteners” drawer, such as bias maker, spare needles, press studs, bra clips, pinking shears, lint roller, and I jammed some business cards in there too.

The two drawer sets underneath (facing the other way) is all fabric. Fat quarters mostly here. I could never colour sort my fabric (I’m too anal and I am pretty sure my head would actually explode) so I file by size. Plus, I’m more likely to look for a bit of fabric for a certain size requirement than go looking for “that blue” bit.

The orange box and the shoebox on top is “scraps under a fat quarter” but much of it is from fabric that was given to me, not my own scraps


An old mannequin I got for $10 but I don’t know how to use it.


I think this is one of the best ideas I’ve ever come up with. I knew vertical storage was ‘the way to go’ to be able to see my trims, so I chose one trim/ribbon I wasn't going to use, hooked it onto a wall, then put all the others in clear bags and pegged them all the way down it. Gosh I’m smart LOL.

It also compels me to put things away!


The drawers on the left were given to me as my 1st ever Mother’s day present (at request), from Howard’s storage world.

The bottom drawer and the fabric stored on top in a plastic cube are 1m or larger of cotton. The yellow box is my LutterLoh Pattern system.
The plastic cube on the right is full of half completed items.


[The top drawer is open in the picture below].

This ‘drawer’ holds my fastening tools, zips, buttons, Velcro, clips. Plus dolls eyes/noses and quilt hangers.
I'm all for clear storage, as you can see.


The following picture looked terribly messy, I thought about leaving it out, but I try to be pretty honest on this blog, and so I'm bearing all - there's yet another bag of fabric (LOL). This HayHouse bag, further to the right, is non-cotton fabrics such as upholstery fabric, vinyl, satin, flannel etc.


The space

“The workbench” AKA our dining table is the pretty constant home for my Brother NS20.
See my second hand lounge in the background which keeps my nicely ironed fabrics out of DS1’s sticky fingers til he gets taller. And I stack almost-finished projects on the lounge for table space, too.


The other view of my dining table which has a fish tank behind it, and my ironing board. I used to have to walk to the other end of the house to press seams and it was laborious!! Plus I was constantly paranoid I’d left the iron on in the spare room, so I even switched it off between chain piecing sometimes!


The tools


My Threads n bobbins. I like to keep the bobbin with the spool.
I use "Bobbin buddies" (those hot pink things) but they're hard to get hold of. John, the husband of Punch with Judy suggested the company might have gone broke in the GFC? I've also seen an idea somewhere that says you can just cut plastic piping to make a little ring, and it will hold your bobbin tails just as well (but you don't have the cute mini handle).
Below is probably one of the most practical things in my sewing life!!
A recycled container, originally bought from Coles full of Anzac biscuits! No matter how cute I think your caddy is, I wont part with this gem, it’s absolutely perfect for the job. Although I wish it was big enough for my scissors and rotary cutter, that’s its only downfall so far.
Once again: Clear storage rocks!


This little kit below spends most of its life on my lounge for all the handsewing parts of projects.
I do all my handsewing while sitting with my husband watching tv ...otherwise I might forget what he looks like. Perhaps I should put my husband's picture on my sewing machine to be sure I remember his face LOL.


Thank you for looking, please tell me what you think?

Coming this month: My Birthday!! And a post about a very special friend (you're not going to want to miss this, it's a special story!)
Coming in May: Amongst other things, I will share with you my blogging processes