Fabric needed:
Cut 1x main piece 10in tall X 5.5in wideCut 2x ear straps in 10in X 1.5in (See note at step 4 regarding width)
Cut 2x lining strips about 4in x 2in
You’ll need about 16in elastic per instruction number 6
1 - Fold right sides together and sew short ends together using ¼ in seam allowance
2 – Per below, Turn right side out and centre the seam between the top and bottom (press with an iron, unlike me. I was trying to help you guys out, whilst being referee like a Mum-on-duty always does, so forgive me)
3 – I’ve pinned (above) to show you how to roughly pleat/gather the sides. See following picture for result of bringing the green pins down to meet the orange pins
Top view of fold…. Pull orange pin out and replace through fold using green pin
Continue on both sides to result in a 2 inch high edge measurement, like in the following 2 photos
I didn’t get caught up in the direction the pleats go, if it makes you sleep better at night then make them all go the one direction hehe….
Some of you will be sighing relief and the rest of you will probably be gawking at the picture a bit longer working out what I’m talking about LOL
4 - Set aside the main piece for now. Fold ear straps right sides together (RST) and sew long edge using ¼ in seam allowance
NOTE: I use a thin bodkin to turn through my straps, but if your loop turner is ½ inch wide adjust the size of your straps to accommodate).
My bodkin is from the cheap/dollar store haberdashery section and I wouldn’t be caught without it
My Jamberry nails design is called Sweet nothing
7 - Gather ear strap up the elastic and baste other end to elastic so that finished length is about 7.5in.I started at 5.5in as in the picture above but it was a bit tight per below LOL
8 – Once you have both ends of elastic and pleats basted, repeat for second side and we’ll baste it all per below
Two things to check:
(1) make sure you’re basting the ear straps to the front side (or you’ll have an unsightly seam across the front of the mask, but I bet it will bother the kids less than it would bother you)
(2) you want the pleated edge to measure roughly 2 inches at the end of sewing this step
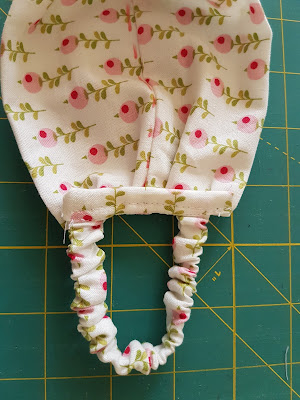
Below is an image of the back at this stage:
9 – Now grab your lining strips about 4in x 2in. Centre them across the front and pin top side first.10 – Turn over…
In below picture, You’ll see I’ve brought the lining strips around the back.
As long as you have more than ¼ inch around the back it will be fine. That’s why I am approximate with the measurements of this bit – use a scrap. Bear with me this is going to work, promise!
Secure with pins. Below is a top view to try to demonstrate the lining piece folding around the edge.
11 – Stitch through all layers (it’s getting thick now)
Sorry I don't know how to change the orientation of my pictures! Picture of the front side at this stage:
12 – Turn out the lining per picture below. If you’re a good girl or boy you’ll press this. 13 – fold down lining piece to meet back of mask and pin in place.
Try to tuck the shape of it inwards a little (so you can’t see it from the front of the mask)
14 – We will sew across where I have marked with a dodgy “”thereabouts line, but this is easier if you actually flip the mask front side up and sew where you can see what you’re doing.
This is why there’s so much excess on my “lining strip”.
See two photos following:
The other side after sewing step 14 (shown below)
15 – Flip over so that front side is facing down again and trim off the lining strip so we can encase it in step 16… (Trimmed…) 16 – final step – Fold lining over again and pin or use quilting clips to hold in place (following 2 photos)
…And sew it down. Front of the mask looks like:
And the back….
Now go rescue some pretend people!!!! Stat!
my cheeky girl
This is for brilliant dress up!! But not suitable for medical purposes especially for a child with a low immune system. Using regular cotton will not make them germ proof, I assume there are specially treated filtration fabrics that would need to be used.Hayley Marotta commented on my facebook post to say “You should totally add a scrub cap to complete the look” so guess what I’m up to tomorrow!?!
Thanks so much for joining me on this post. Please credit CassTheCoolest if you pin my post
You can find me on facebook sharing sewing memes and creations at facebook.com/cass.coolest
I love comments and messages and I REALLY love pictures of your creations. Connect with me on Instagram or snapchat to share yours, please!
~CassTheCoolest


