Life story - the short version


I'm a fun loving 30 something year old . Married my favourite guy. Started on my production of children & number 1 is an adorable boy. Big on family. Big on craft. Love country music. Love fuss free + practical ...aaand maybe with just a little bow for decoration!

Love the law of attraction too. And singing ...dancing ...bright colours and excessive punctuation ...and stationery.

Friday, June 22, 2012

Town in a box - handmade for Ollie (and Sydney haul)

Town in a box. I forgot I hadn't blogged this til I was talking to Rhonda on the way to the Sydney craft fair last Saturday!

I made this gift, based on a painted project in a very old craft book called Clever crafts to decorate your home (J B Fairfax Press).
But seeing as I can't paint to save my life, it was actually easier to cut out every piece of the map (that I adapted) and fuse and free motion!

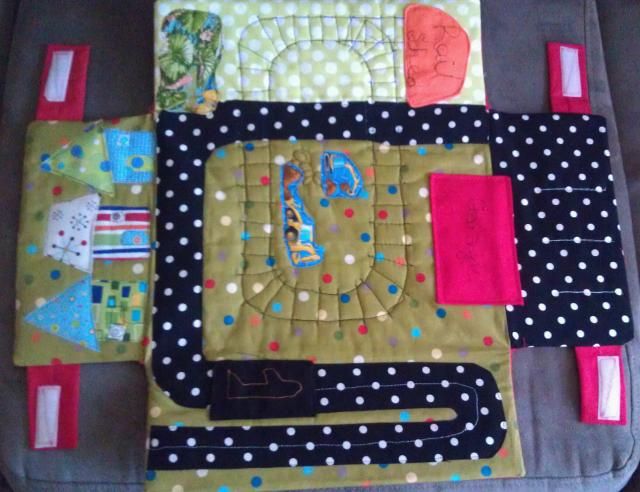
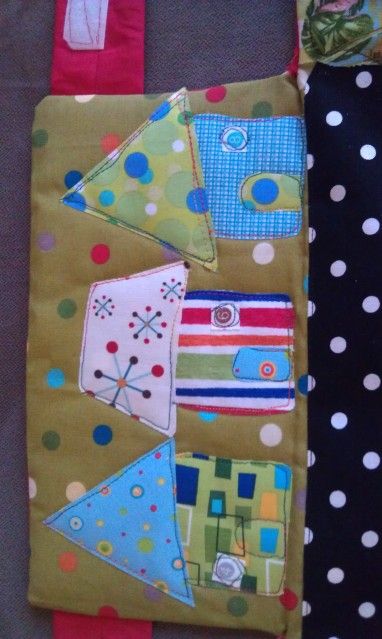
Town on the left (note the houses are numbered 4,6,8 thanks to a bit of selvage LOL)
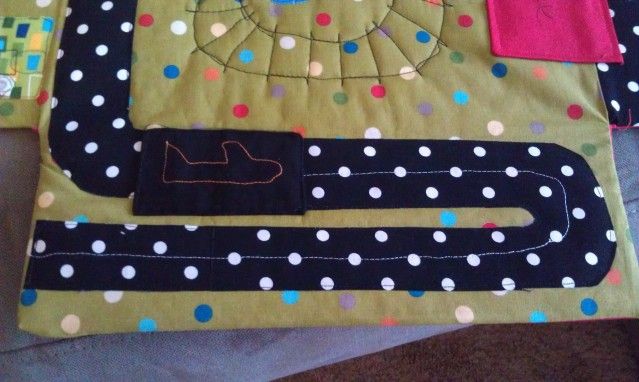
Airport & runway on the bottom (Yes that's a plane, shut up it's totally cool LOL)
Through the centre you have the rail shed, some construction zone with diggers and a bit of a swamp in the corner
And at the right hand side you'll find the garage and carpark!

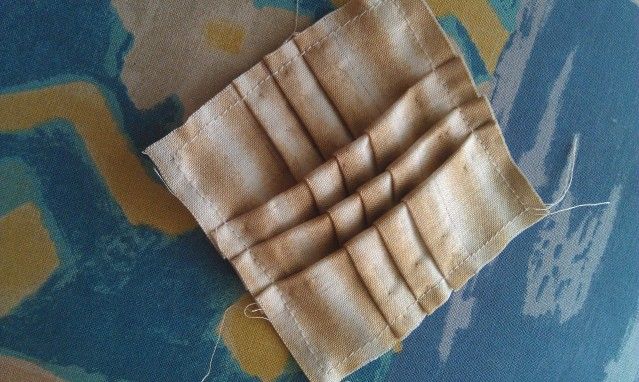
It fold up, and the idea is he can carry along all his Chugginton trains and matchbox cars inside :-D <--that's me grinning because I think that is SUCH a cool idea.

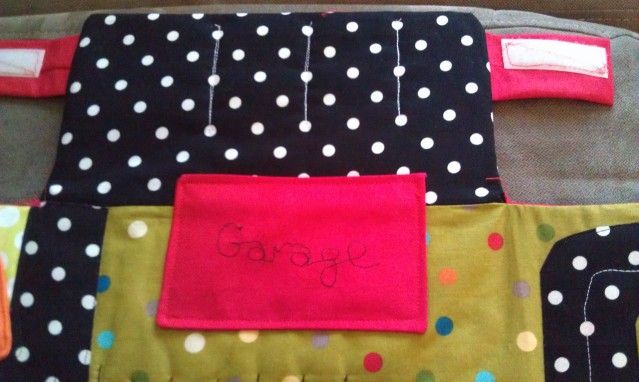
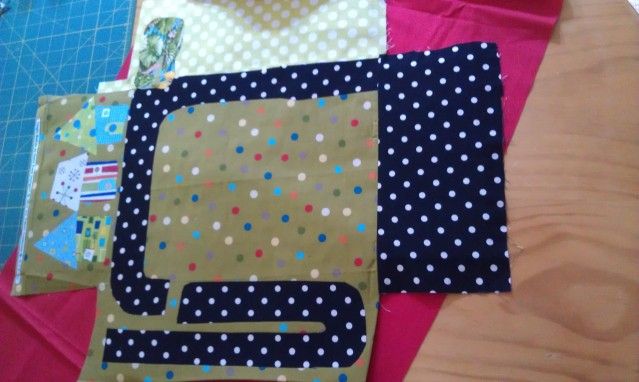
Garage and rail shed
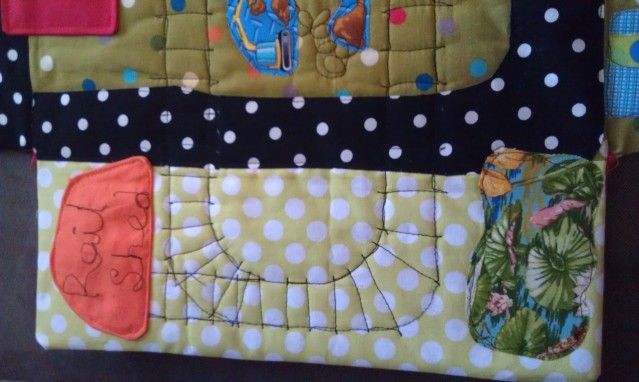
Yes, I free-motion-quilted that rail track hehe

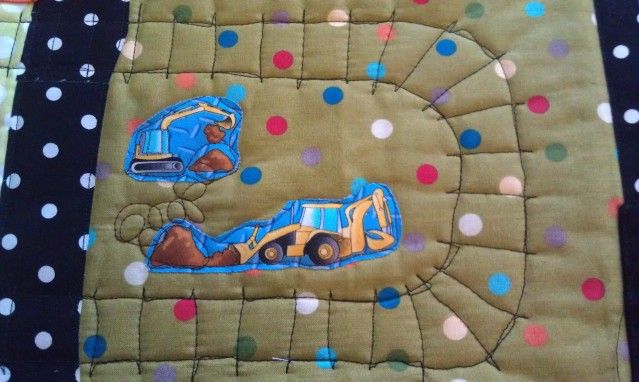
Construction zone and airport/runway
Kooky homes

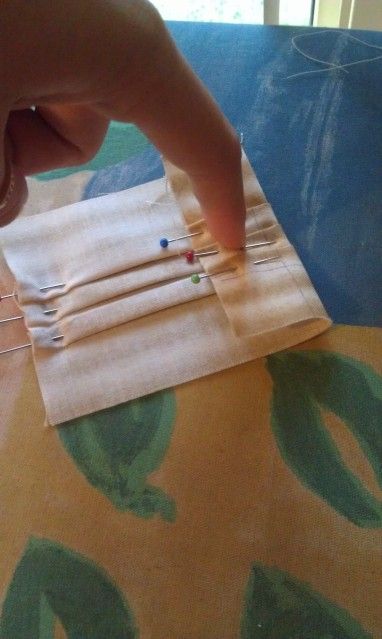
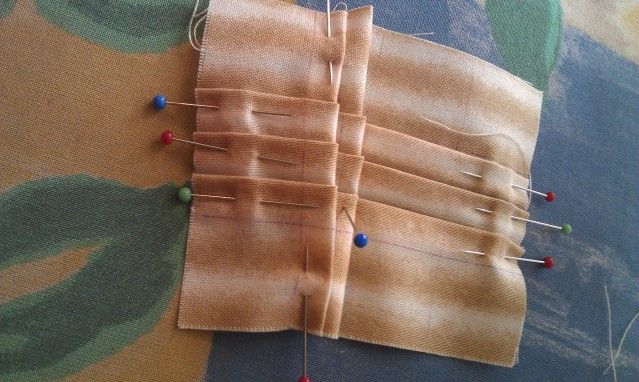
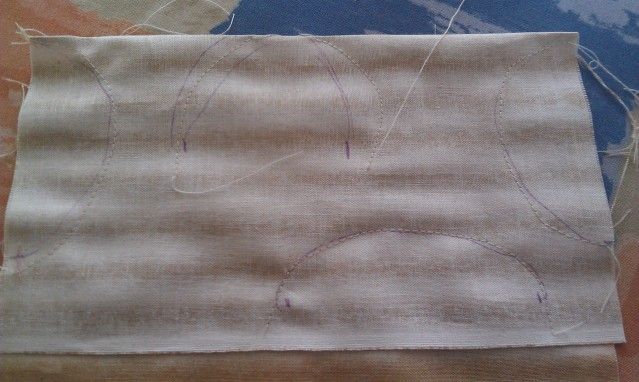
A work in progress shot:

Once again, the finished product:

I made it out of a cardboard gift box and cut the corners of the giftbox so it would lay flat.

Happy Second Birthday, Ollie!


PS I got quite a haul at the Sydney show. Here are my goodies (looks a bit like a travelling stash LOL but these are all firmly planted in my house hehe)

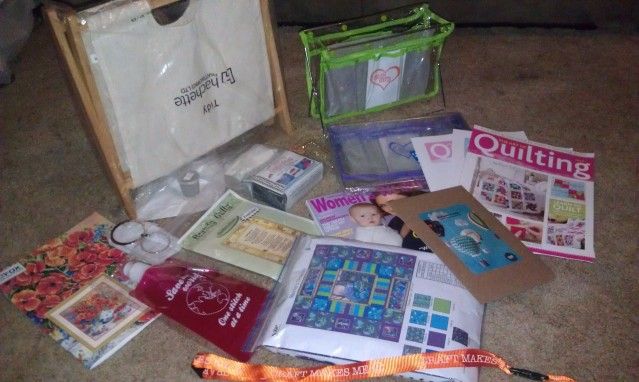
From top left (clockwise) I got a magazine rack, a handy caddy for myself (and one for Mum - happy Mother's day when you get home, Mum, yours is the green one), the art of quilting magazine set, an irresistable pattern for a hot-air-balloon baby mobile, a free women's weekly, a quilt kit for a magical quilt (that I thought was so out of the ordinary!), a new Lanyard (Says craft makes me :-))...


The pink thing is a collapsible water bottle, the latest FOX Collection catalogue (the cross stitcher in me LOVES reading this!), the silver rings are handbag rings, emery powder to make a kickass pin cushion, a "pounce" for transferring patterns using chalk, and a piece of fabric with a preprinted quilter's poem on it from Brandy Gully.

Love,
Cass

Friday, June 15, 2012

Desperate housewives quilt block 8in original "Tumbled Rose"

Well you know I love a deadline, and most of my sewing projects are finished at the 11th hour. But I don't normally "Join" things at the 11th hour...
Last week, Jane at quiltjane.blogspot.com.au reached out for people to make original 8 inch (finished) blocks in line with her Desperate Housewives Quilt Challenge which ends this week. She had 6 people pull out over the 50 weeks and so I thought "Well I can do that" and said yes.

So I have done the tutorial on how you can make this block too.
It's called "Tumbled Rose" and I'm mostly stoked with how I treated the large print border fabric. It was my first attempt at the origami rose (book details at the end) but I think I did ok at that. I added the outside petals myself, and that's part of what makes it an original block.

Enjoy...


Materials:

  • 5in square of centre/rose fabric plus scraps for outer petals
  • 1.5inch strip of (pink) first border fabric about 17 inches long
  • 3 inch strip for second/outer border about 27 inches long
Method:
Begin by marking your 5 inch square at every inch (I used my invaluable Sewline Air Erasable Fabric Pen).
You really only need to mark the inches along the outside but I found it helped keep my folds straight by ruling right across

Fold your beginning inch into thirds bringing up the fold to the ruled line as below:

Press.
Pin it and continue with other inch marks, excluding the outer inches.

Now do the same folding, perpendicular to your original folds.

I found that pressing each third was more helpful seeing as this direction was a bit tougher/stronger than the first folds. (remember: Glass head pins, plastic head pins will melt under your iron)

Check your block is 3 inches x 3 inches.
If it's too small, stretch your tightest folds and press again.
If it's too big, tighten your widest fold/s until you're better off. Press.
Now baste about 3/8 inch from outside edge and remove your pins

Right sides together, make some semi circle petals. I purposely made mine different shapes, print directions, and sizes.
Remember, nothing in nature is perfect, forgive yourself for dodgy bits on this project.

Cut them out and then turn them through (no photo of them just turned through until next instruction).
If you've sewn curves before you'll be tempted to notch the curves but I didn't do it on mine because I wanted the petals to be odd shapes and with volume.


Now pin your petals to your basted centre block, raw edges out.
I used five petals, and even made one go around a corner to try and get some depth

FYI Flipside below: You'll likely have a bucketload of pins in by this stage.

Sew over your original basting to secure the petals. Trim your block again.


First border: Cut two of 1.5inch by 3inch strips and sew to your centre block as below. Press.
Seam: 1.4inch this time & from here onwards, hiding all your basting in the seam.

Cut your next two border pieces to 5.5 inches long and sew to the sides. Press.


Second border: Cut two of 3inch by 5.5in and sew to the outer edges per below. Press. (Here is where I purposely selected the large print to be at one corner of my block)

Cut two of 3inch by 8.5 inch strips and sew to complete the block. Check measurements and trim if necessary.


Pin your petals out of the way, and unfurl your folds.

Pinch the centre of your block and spin as many times as you can in one direction to reveal the rose.

Secure with hand stitches. I found it difficult to keep the block flat at this stage, be mindful not to pull your stitches too tight, or you could try some type of interfacing (suggestions welcome in comments box!)

Use your thread to sew the edges of your petal to the first border, keeping in mind you may want to bend them into shape before deciding where to stitch.

And there you have it!

For more origami flowers and fabric folding, check out Rebecca Wat's "Fantastic Fabric Folding: Innovative Quilting Projects"

Tuesday, June 12, 2012

Sasha Stash has only two states to go!

The travelling stash was with Shirley P recently, and this is the latest collection:

Shirley took out the following items:

and replaced with the following items:

It's in transit to Kylie B now, and Kylie is the last Victorian on the list of non-Eastern state participants!
This means it's only NSW and QLD left ...so your turn might be next?

Shirley didn't have blog of her own, so I'm sharing her pictures on her behalf. Remember you can check out all the people whose blogs will feature Sasha by visiting the list of stashers.


It's important to note that the stash is being talked about on facebook in A NEW FACEBOOK GROUP. Come abd join us!

A moderator of the Quilt Club of Australia facebook group allegedly received "concerns" that the Quilt club of Australia group was "losing focus a bit".
I actually think that's a crock seeing as the travelling stash is made up of quilting items and is going around Australia, not sure what missed focus is going on there, but I don't make the rules, so we will just run with the new group where rules won't be so rigid.
Please feel welcome to join the Travelling stash Australia group and follow the fun that is Sasha Stash.

Check out the new stashes coming up, exciting craft stash: Clara, and Fat quarter stash: Farrah - but be quick, these are almost ready for launch!

Love Cass

Saturday, June 9, 2012

Shell stitch for Winter

Not much sewing at my place last week, a lot happening in my family.
As I write this we are returning home from farewelling Pop Laurie in his home, Gloucester. He would have been 90 next month, and had an interesting life. I met him when I was 16, and remember the cool Winchester memorabilia in his gun room was probably one of the earliest memories I've got. He used to drive down to my in laws & the first 30 mins of conversation would always be about the 2 & a half hour drive. More if there was anything different or road works hehe.
Always seemed chirpy, I hope to be like that in my 80s.

So that was part of the reason I hadn't sewn much. But I *did* manage to hem a skirt I've been wearing before I finished it properly hehe.

My Mummy friends and I are finding one of the biggest changes in our lives is to make a weekend wardrobe, of 25% of your life, extend to 100% of your days in your life as a Mum. I've really questioned my style the last 15 months and wondered what I would wear given unlimited budget.
I've found tights are suitable for chasing a 1yr old but warm enough etc and began thinking about short skirts I can make to wear with them.

I made this bias skirt and began wearing it unhemmed simply bcoz I needed something to wear & I hate hemming.
It was beginning to look bad though, so I thought I'll give my machine's shell stitch a go along the edge.


It looks a little more complete which I'm happy with. The instruction book said fold your fabric on the bias & shell stitch so the needle periodically drops over the edge of the folded fabric.
Not one to do sewing by the book I took my chances on a raw edge & will happily do it again. What do u think?


Although next time I won't wash it do many times before I get to it ;-)

posted from Bloggeroid

Friday, June 1, 2012

A bit of this and a bit of that, to taste


I know my friends call me a wifey girl (to my delight) but I never felt I fit that term "domestic goddess". You see, I don't have the penchant for cooking.
I think I've blogged before about how (poor me) I missed out on cooking class in high school. My brilliant Husband cooks dinner for our family every night. He isn't bad, either. So when I say I made something inventive using "my own made up recipe" I see that look wash over his face that says "you don't know enough about food to go INVENTING your own recipes, and I wouldn't be surprised if it tastes worse than banana with tomato sauce" haha. Swiftly followed by an attempt at a smile because we have had this discussion before, and I ask him to give me a chance before the inevitable response of "it doesn't work like that".

So I made these pasties today, and I forgot to include the ingredient: flavour. Oops. Well, I dropped the spice all over the floor, and although I had put *some* in with the mince (before dropping it), can of four bean mix, and frozen veggies, I think I needed about 4 times more.

I'm going to pour a LOT of sauce into a bowl before serving them up to him later... Hmm I wonder if tomato and sweet chilli would go well together?!

posted from Bloggeroid