No pictures this post, just a little journal entry to verbalise where I'm up to.
I've been looking at the name game mini quilt swap inspiration board lately and it's so exciting to think someone's out there reading my blog (well, that's exciting on its own because I don't really reach anyone as it is) but that they're making something by hand with their heart, JUST for me!
I'm so excited because I've often seen co-ordinated "swaps" but they have always been finalised, normally years before I see the blog.
I was excited *just* to take part in it and have the opportunity to make something for someone else across the globe.
I pray and wish that she likes it and wants to show people what someone like minded made just for her.
...Then I remember that I too will end up with something handmade, which was made up (ideally) based on interpretation of my style.
I obviously love handmade. We don't often make things for our handmaking friends under the pretence that "she can sew, she doesn't want me to make something like that for her. She could just make it herself, probably better than what I could do anyway". But this just has so much mystery to it, and it's made me realise how little I end up with when the sewing's done.
When I *do* finish something I'll often critisize it and say "oh but the hem is a bit strange along here" or 20 other excuses about it, but I guess I'm a woman.
We try to level ourselves so that we are not someone to be jealous of, outcasting ourselves from the others. Listen to me ...I think I'm Carrie Bradshaw tonight LOL

Monday, January 30, 2012
Wednesday, January 25, 2012
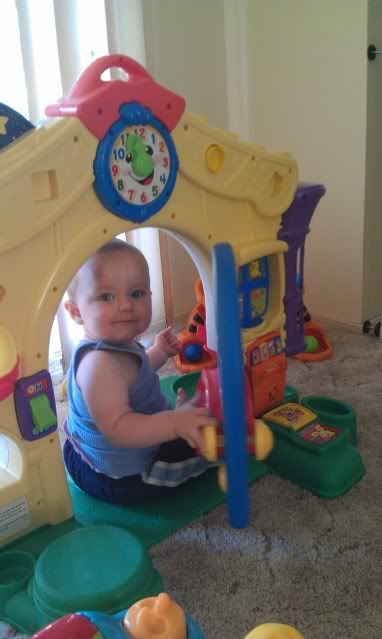
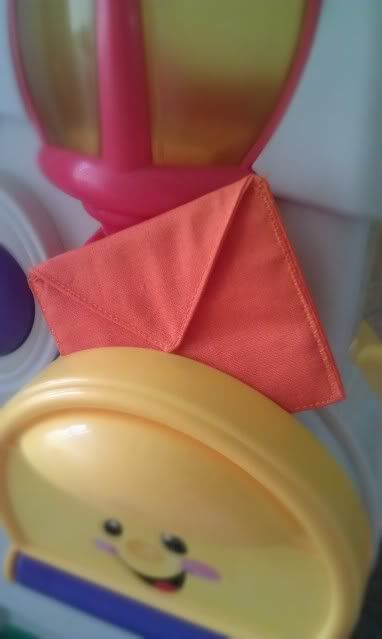
Teeny tiny envelopes for Fisher Price letterbox (and door)
My son loves carrying around the envelopes that go with the fisher price letterbox and with his Fisher price door. But because the door was second hand, we only have one envelope. So I thought I'd whip up a few extras for fun.
TUTORIAL:
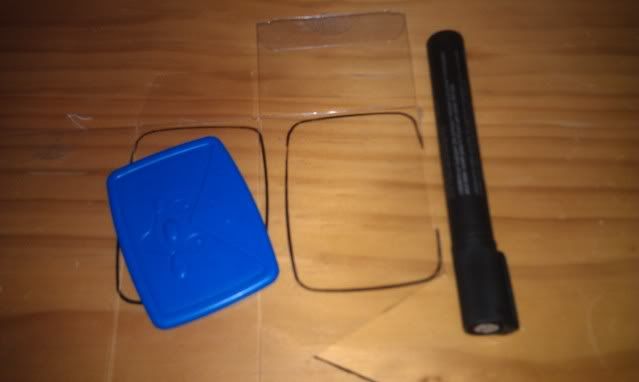
Using an old plastic container (mine was from Christmas decorations I purchased) trace around your existing envelope, or just draw whatever size you want.
Then cut out.
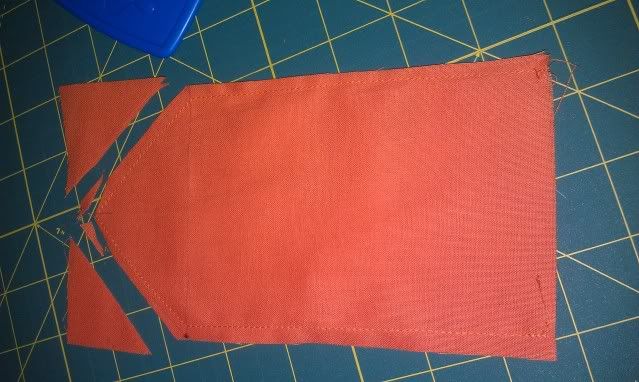
From your fabric, cut TWO pieces which are: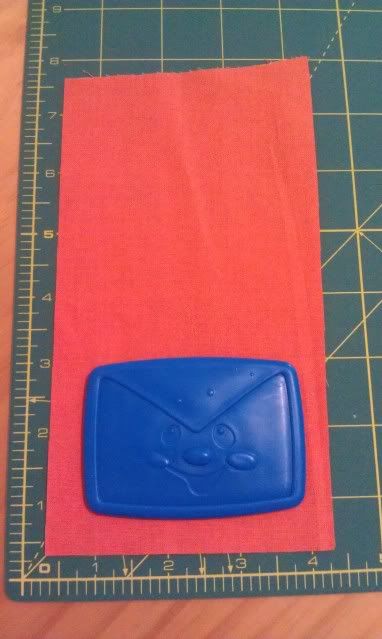
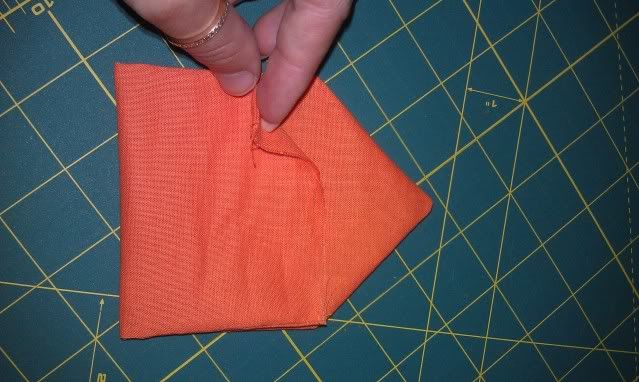
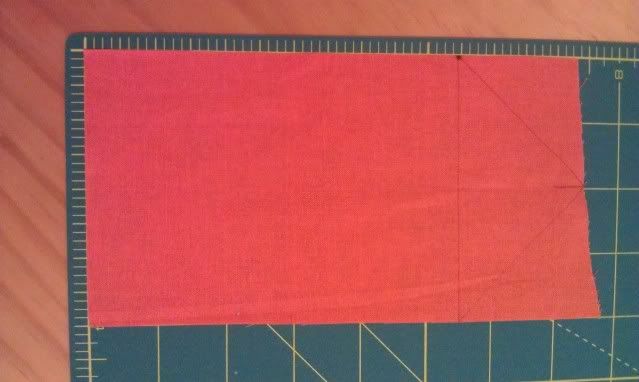 Find the centre of one short end and draw an envelope point
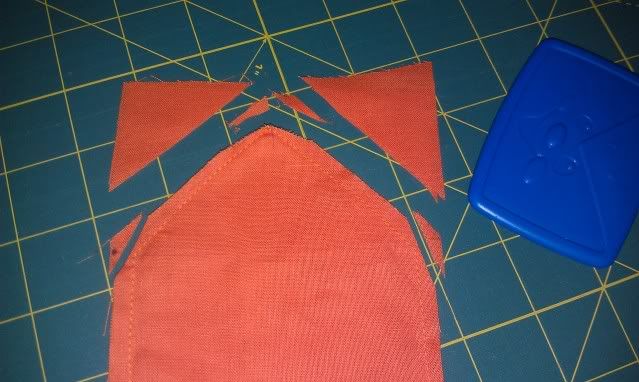
When sewing the point, be sure to avoid sewing right to the edge of the fabric or when you turn it out you will get fraying ends.
Sew around envelope, starting with one long end. Leave the flat short end open.
Find the centre of one short end and draw an envelope point
When sewing the point, be sure to avoid sewing right to the edge of the fabric or when you turn it out you will get fraying ends.
Sew around envelope, starting with one long end. Leave the flat short end open.
 Trim all the corners before turning
 Oops almost forgot the sides.
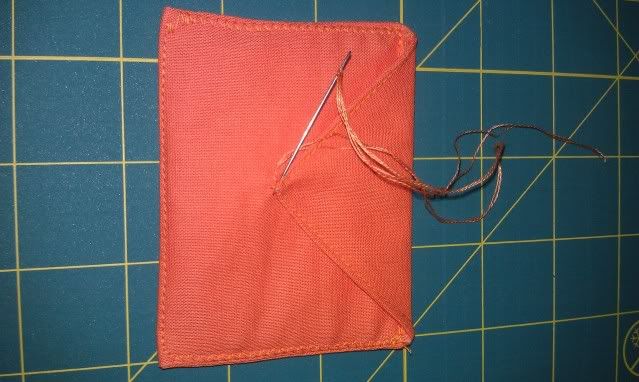
 I wish I had thought about putting an address on there first. Maybe next time.
***** Here are two more, made using patterned fabrics from Windham fabrics, named "Little Menagerie" by Melanie Hurlston of Melly and me. One I left "open" by not hand-sewing down the point. And the other one I avoided handstitching by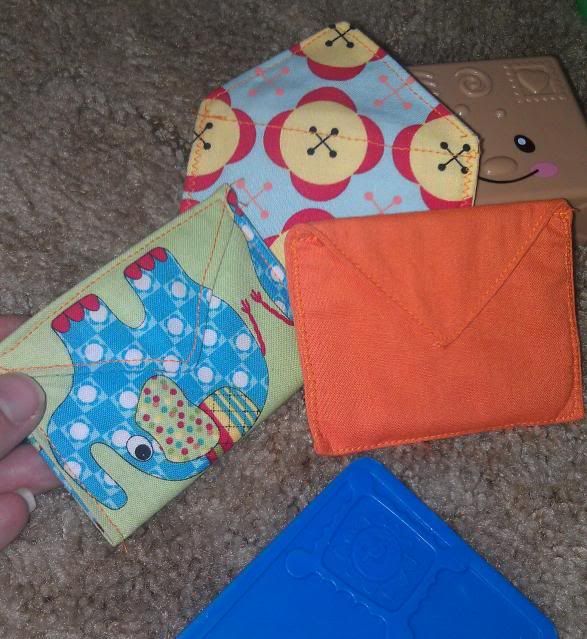 What do you think?
Could you make some of these for someone you know?
TUTORIAL:
Using an old plastic container (mine was from Christmas decorations I purchased) trace around your existing envelope, or just draw whatever size you want.
Then cut out.
From your fabric, cut TWO pieces which are:
- as wide as the envelope plus generous seam allowance, and
- height of two and a half times the envelope plus a seam allowance
Find the centre of one short end and draw an envelope point
When sewing the point, be sure to avoid sewing right to the edge of the fabric or when you turn it out you will get fraying ends.
Sew around envelope, starting with one long end. Leave the flat short end open.
Trim all the corners before turning
Oops almost forgot the sides. - Flip through (and if you're good, you'll press/iron)
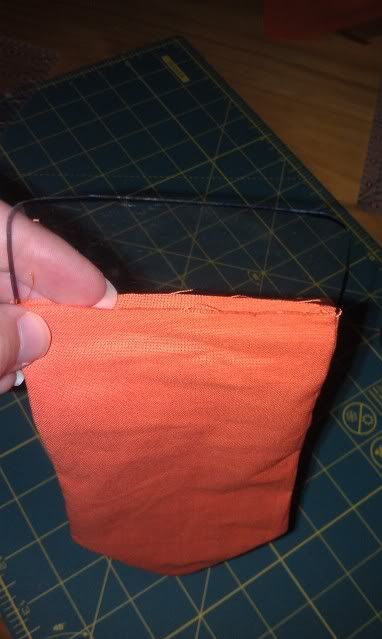
- Insert your piece of plastic inner as shown and push down toward pointy end.
- Fold up the flat, open end and stitch a line to seal it (no picture of this single seam)
- Sew a line of topstitching around the whole outside (should be a stereotypical "house" shape at this stage). I zig-zag stitched on the sides just because I have a new machine and I can't help but try out everything.
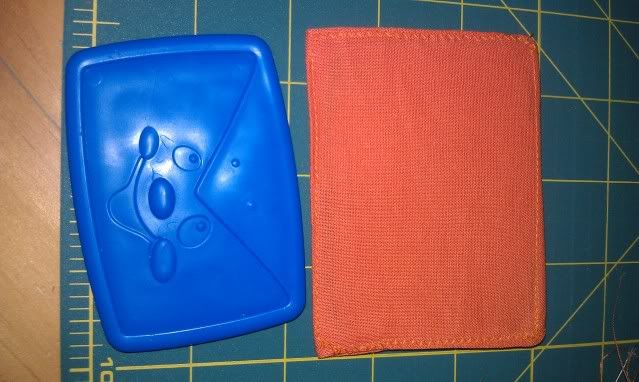
- Fold down the pointy end over the first seam you sewed (to hide it) and secure the pointy end with a few hand stitches.... or see below to avoid handstitching.
I wish I had thought about putting an address on there first. Maybe next time.
***** Here are two more, made using patterned fabrics from Windham fabrics, named "Little Menagerie" by Melanie Hurlston of Melly and me. One I left "open" by not hand-sewing down the point. And the other one I avoided handstitching by
- just topstitching the pointy end instead of sealing the short end, and
- folding the point down prior to topstitching around the whole outer. This means the point can be lifted a little but it keeps the envelope shape.
What do you think? Could you make some of these for someone you know?
Wednesday, January 18, 2012
Mini house ornaments for mini people
When I thought about my oldest sister moving away for two years with her Husband and three kids I knew I would think of them often. There is 10 years between us but we've been sisters for as long as I can remember and our age draws no barriers.
I found Retro Mama's tutorial on little houses and my sister's situation was the perfect excuse to tuck in.
I ditched the birdie and embellished each of the doors with their first initials.
I made the hangers quite long so that they could hang them over a door knob or wherever they could find in the new home to make it their own. A few buttons from my button treasure chest for the handles and the hangers and I got to play with lots of decorative stitches on my new baby.
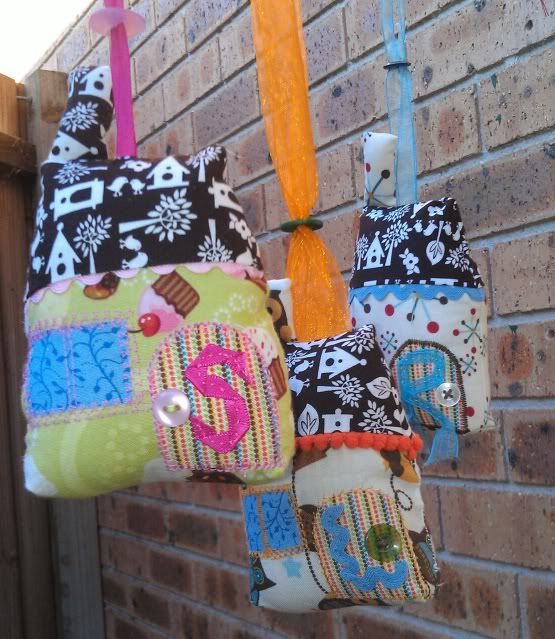
I stuffed the chimneys even though the tutorial didn't.
She said you can use selvedge for the house numbers which I think is brilliant, but house numbers didn't suit the purpose.
The tutorial is here

I found Retro Mama's tutorial on little houses and my sister's situation was the perfect excuse to tuck in.
I ditched the birdie and embellished each of the doors with their first initials.
I made the hangers quite long so that they could hang them over a door knob or wherever they could find in the new home to make it their own. A few buttons from my button treasure chest for the handles and the hangers and I got to play with lots of decorative stitches on my new baby.
I stuffed the chimneys even though the tutorial didn't.
She said you can use selvedge for the house numbers which I think is brilliant, but house numbers didn't suit the purpose.
The tutorial is here
Name game quilt swap - waiting for the GO. Entry is closed
Just used a little tool to make a mosaic for inspiration for my swap partner in the name game quilt swap I mentioned in this blog last year. Tomorrow or Friday I will get the details of who I can quilt for and I will get started right away!!
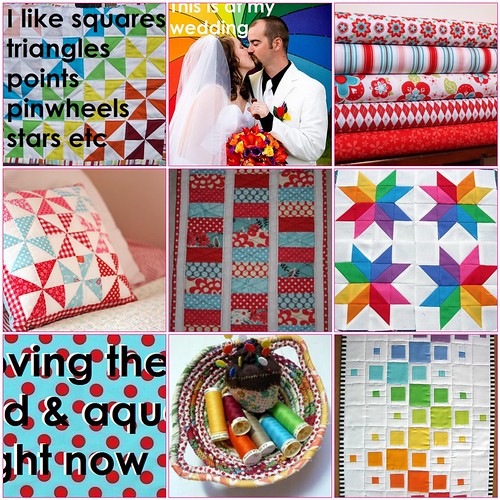
1. I like squares triangles points pinwheels stars etc, 2. I love brights, this is at my wedding (and it wasn't even raining), 3. sold etsy fabrics 4. R&A pinwheels5. red n aqua, 6. Cute rainbow stars, 7. "loving the red & aqua right now"8. Rainbow bowls 9. Rainbow again
Created with fd's Flickr Toys
Sunday, January 15, 2012
Block of the month update - 4 and a half blocks done
Here is the update of the quilt I'm making block by block, as first mentioned in this blog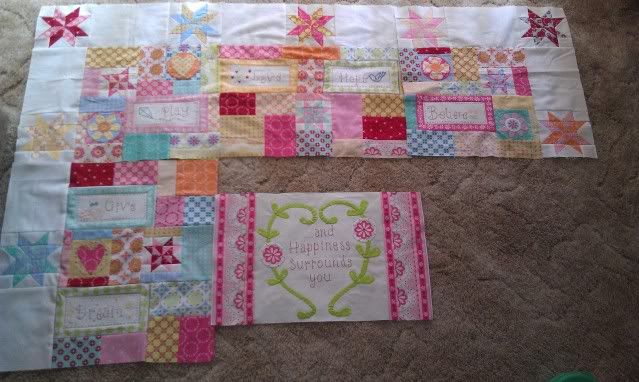
Fails - Yes we all have sewing fails!
Just a few examples of the ones that got away.
People see the projects that worked out, and think "Wow you're so good at sewing" which, let's face it, I'm pretty awesome -but there are a few fails in between that I think you should know about :-P
I went to make this cute truck from Make it and Love it


I thought I used all her measurements but apart from the size being all wrong the thing is more crooked than Christopher Skase!!
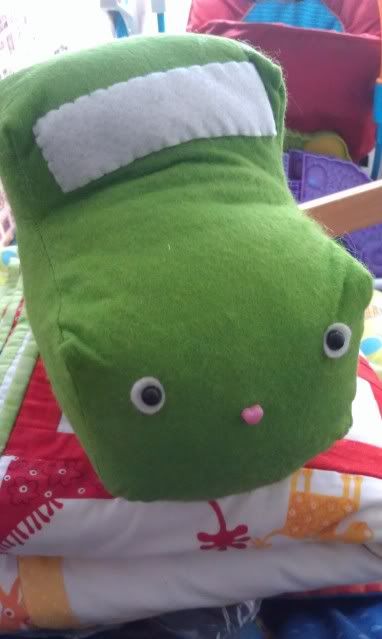
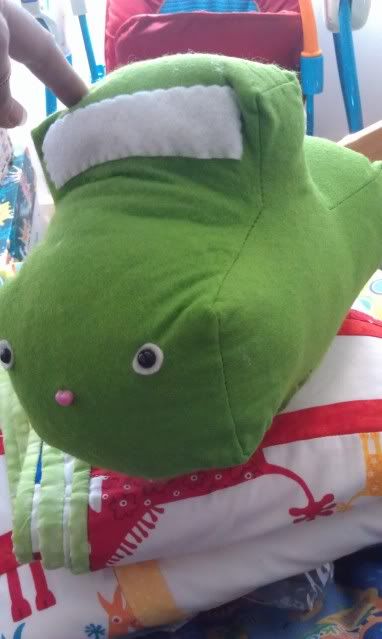
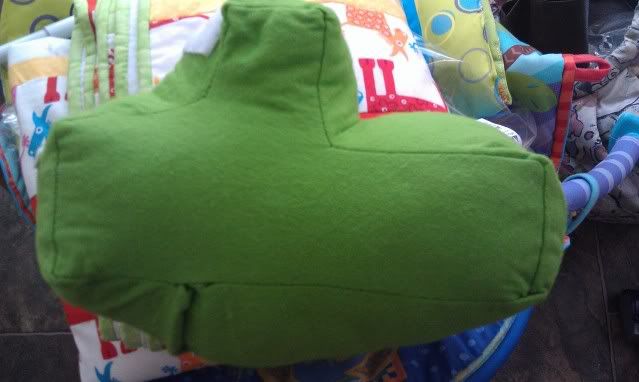
Maybe I will cut out the face to use for something else, and put the stuffing back into my stash but no child is going to be damned with this hideous toy... FAIL!
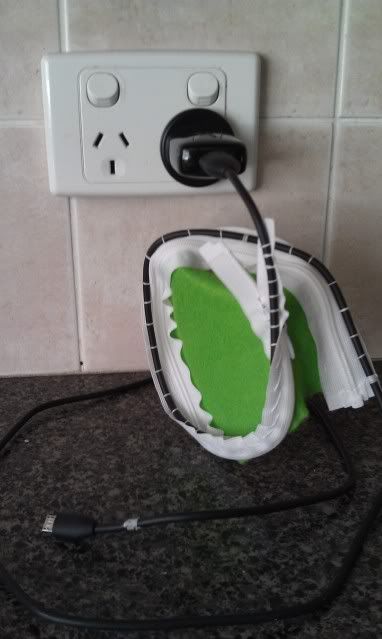
Another one, I loved this idea of Zipped up earbuds and thought zippers could help tame my phone charger cord which takes up too much of my limited kitchen space!

But I didn't measure the zip, it ended up way too short and the result is once again: hideous. I've since unpicked it and it's back to the drawing board!
I'm sure there are more, I'll add them as they come to mind (or as they happen in future). I'm sure others can relate!
People see the projects that worked out, and think "Wow you're so good at sewing" which, let's face it, I'm pretty awesome -but there are a few fails in between that I think you should know about :-P
I went to make this cute truck from Make it and Love it
I thought I used all her measurements but apart from the size being all wrong the thing is more crooked than Christopher Skase!!
Maybe I will cut out the face to use for something else, and put the stuffing back into my stash but no child is going to be damned with this hideous toy... FAIL!
Another one, I loved this idea of Zipped up earbuds and thought zippers could help tame my phone charger cord which takes up too much of my limited kitchen space!
But I didn't measure the zip, it ended up way too short and the result is once again: hideous. I've since unpicked it and it's back to the drawing board!
I'm sure there are more, I'll add them as they come to mind (or as they happen in future). I'm sure others can relate!
Pumpkin bag tutorial - big beach tote or nappy bag
A lady named Teresa was interested in recreating a bag she saw for sale on Etsy. I knew that around here it's known as the pumpkin bag (have a geeze at it and you understand, 'cause it looks like a pumpkin!) but I couldn't, for the life of me, find a tutorial. So I offered to make one.
[Then I went out and drank excessively for the first time in 2 years and am rather hungover ...damn. I'm gonna apologise in advance for being so vague with directions]
This is the idea...


So for MATERIALS, you choose the size you want, and I'll tell you the size in the pics. I have also done this with 2 fat quarters before, see pic of the green bag at the end.
Please comment if you read this, and let me know where I need to be clearer. I love interacting with ...well, anyone!
[Then I went out and drank excessively for the first time in 2 years and am rather hungover ...damn. I'm gonna apologise in advance for being so vague with directions]
This is the idea...


So for MATERIALS, you choose the size you want, and I'll tell you the size in the pics. I have also done this with 2 fat quarters before, see pic of the green bag at the end.
- Wadding to cover all pieces apart from any pockets you include, and the buttonhole loop (in mine it's a total requirement of 22x27 inches plus handle - see my handle measurement below)
- 2x squares for bag lining and bag outer (or rectangles, it doesn't matter) "Square A"
In the pic I've used 22x22inches (56cm)
- 2x pieces for "Rectangle B". For 'binding' the bag edge where the fastening goes
12x5 inches (this needs to be 5 inches deep so that you can fold over and bind the edge, but as for width: simply make it a bit over half your square's width)
- Scrap for button loop
- button or other fastening if desired.
- Handle on mine is made up of strips totalling 80 inches by 5. The bag on Etsy has a drawstring handle using a casing instead of making a handle, which I think looks more modern.
- Pocket materials if you want any.
- Begin by sewing your pocket to square A fabric if you're having a pocket. (inside)
Here's a link to my favourite pocket tutorial
- Then sew the sandwich of fabrics together: Front, wadding, back (right sides facing out).


- Gather the "top" edge to bunch in to the width of your "Rectangle B" and pin with right sides together like below.
If you have a pocket, make sure the pocket opening is facing the gathered edge. (Either this one or on the opposite side which will become the other top edge)
 Then sew through all the layers, removing pins as you go. If you are able to use a walking foot (AKA Quilting foot) or release the pressure foot a little, that will help with the bulky sewing.
- We will then do the same thing on the opposite edge. (Bunch>Pin>sew)
If you are fastening with a button like in my pic, create a strip of fabric and pin it between the "square a" and "rectangle b", facing in, like below.

Once you finish off, you will end up with this effect:

- Then you need to fold over the "Rectangle B" (so that no raw edges show) and machine or hand sew it down. (Sorry I don't have a separate pic for this)
- Next is the handle, to be affixed in the same way as the Rectangle B after you baste some wadding to it
(I didn't worry about wadding in the handle of my mini bag, I think it looks too "80's"). So- bunch the side to almost half as wide as your full length and pin.
- Pin the handle on, right sides together and sew to the edges of "Square A".
NOTE: I could use the one long handle piece as long as I joined the handle in the following way (big blue bag). I got this wrong on my little green bag and needed two handles. Take time to study the difference between the two pictures:


- bunch the side to almost half as wide as your full length and pin.
- Do this for both sides (affix the handle, right sides together), then fold your handles so that no raw edges are showing and sew all the way around to finish your bag.
Wa-la!


Please comment if you read this, and let me know where I need to be clearer. I love interacting with ...well, anyone!
Saturday, January 7, 2012
I love a deadline - 52 projects for 2012! 1 of 52: Bunting
I've joined a facebook group with the intent to make 1 project per week, all year. Big ask, I know. But it's the first week of the year and so far: so good!
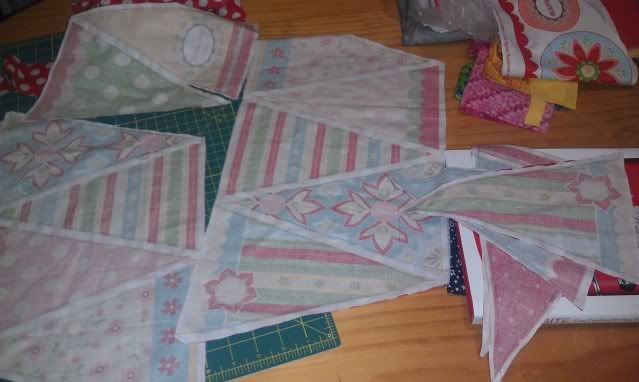
There was a theme for week one, being "Party". One of the 3 suggestions was bunting. I've had this scrap of a panel given to me a while ago, and I didn't really like the warm yellow & beige in the collection, so I haven't done anything with it.
Seeing as I knew it would come together fast, I quickly pinned it right sides together and sewed all the seams before cutting the flags out.
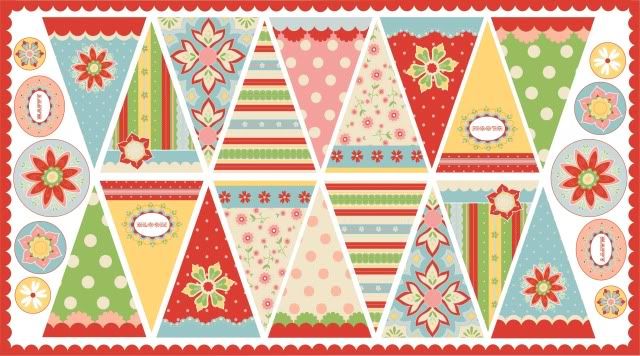
I laid it right-sides-together on some backing fabric and just sewed straight from one side to the other zig zagging to the end - SOO fast! I started cutting out then remembered I must take a picture!
This is how it turned out. I quite like it, the aqua mosaic design is my favourite one (top left).
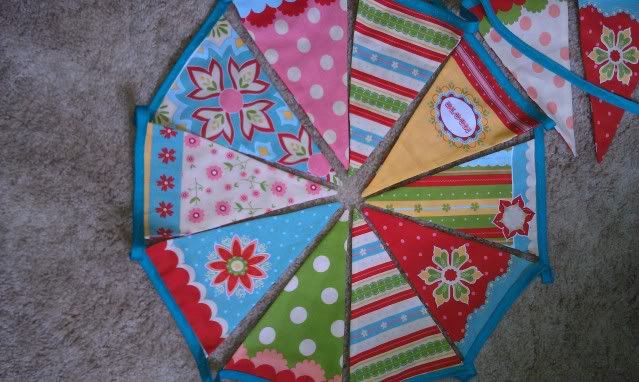
What do you reckon?! Cute?
There was a theme for week one, being "Party". One of the 3 suggestions was bunting. I've had this scrap of a panel given to me a while ago, and I didn't really like the warm yellow & beige in the collection, so I haven't done anything with it.
Seeing as I knew it would come together fast, I quickly pinned it right sides together and sewed all the seams before cutting the flags out.
I laid it right-sides-together on some backing fabric and just sewed straight from one side to the other zig zagging to the end - SOO fast! I started cutting out then remembered I must take a picture!
This is how it turned out. I quite like it, the aqua mosaic design is my favourite one (top left).
What do you reckon?! Cute?
Thursday, January 5, 2012
Lots of NEW things lately!
A new year, a new hair cut, new local craft store, a new sewing machine, a new sewing machine trolley... HAPPY NEW YEAR
I took back the Singer 6180 Brilliance after the needle plate was giving me grief (not being flush with the rest of the machine's arm) and unfolding my pressed seams right at the crucial moment :-(
It was a really hard decision because I'd fallen in love with all the listed features of that machine. I'd been stoked that all my accessories were compatible and I was so disappointed when I decided I just couldn't work with the needle plate. I never realised how personal replacing your sewing machine would be!!
The staff member at Lincraft Tuggerah was unbelievably helpful. She offered me a refund and also showed me comparable machines. I was so impressed that I wrote a letter to the manager.
I came home with a Brother NS20 to compare. Originally I had intended to only compare features and not even take the Brother machine out of the box unless it was suitable. After more research (and I mean completing a 38 heading spreadsheet for four machines including the Janome DC4030 and Janome DC2101LE from All about sewing) and in the end I chose the Brother NS20.
I’m now happier with the Brother machine than I was with the Singer, and guess what? The bobbins are compatible with my old bobbins! Yay!
So I'm making grey Ohio stars with it at the moment. I'm thinking of turning them into a new machine cover with the works. I want a place to store my cutter and stuff, and I think I can hang it on the back of the chair when it's not over the sewing machine. Ideas Ideas Ideas ....any sewist will relate.
So many ideas, such a short life!
Subscribe to:
Posts (Atom)