


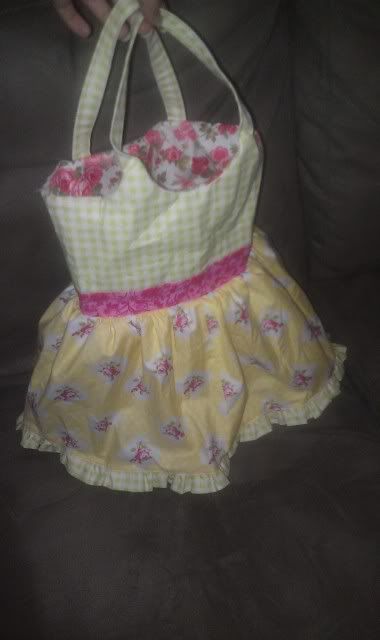
It's just adorable isn't it??
A lady from my sewing group brought in a simple 2 dimensional bag with a bit of trim around it that made it look like a dress. I thought "I could do that!" But once I released the girly fabric I got really carried away (pinks and roses and frills! Oh My!) and I'm really happy with the results.
I knew it would be somewhat cute, so I made a tute for you along the way :-)
This tutorial is intended for someone who has made a bag before, is willing to choose their own length for the straps etc.
Materials:
- 4 fat quarters (Lining, underskirt and rosette, top, skirt)
- heavyweight interfacing. About a fat quarter's worth or whatever height you want your bag plus 2x width.
- thread of course
- Buttons to make the back look like the back. I used Ashley's DIY self cover buttons idea with no kit to cover my buttons
Method
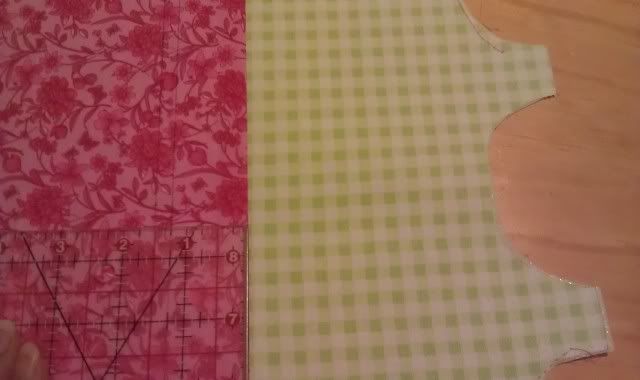
- Begin by making a template for the top (in my example the green fabric) and the lining, using my measurements below.
Of course, you'll have to save up for an expensive template - oh no wait, I made my template from an ice cream box which was about to go in the recycling bin!!
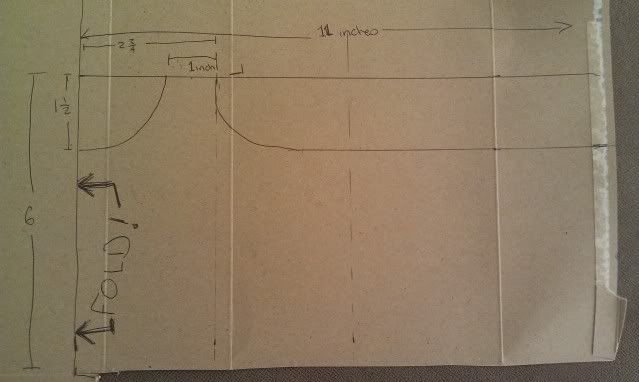
Make the shape however you like, but make sure it's toward the front of the template as this will be the front of the dress bag.
- Start with your fabric that you'll use for the top. FOLD YOUR FAT QUARTER IN HALF before tracing on your cutting line. I forgot to do this with a pattern a few years ago and I'm seriously scarred by it!
- Then trace your cutting line on, and cut out your fabric.
- Cut some straps out of this fabric too. Whatever depth and width you like.
You only need the top 6 inches of this fat quarter plus straps, so you can use the rest for embellishing the bottom of the skirt like mine if you like.

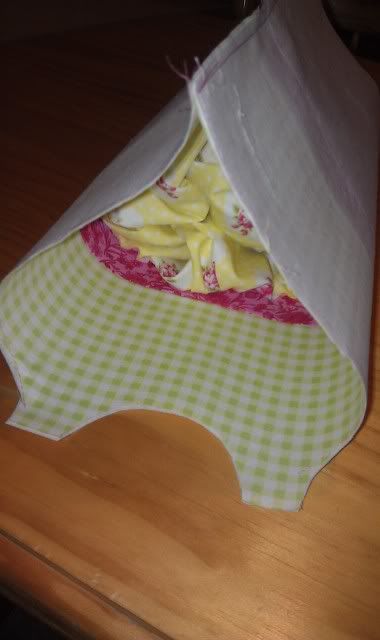
- Continuing on, cut the (template) shape out of the top of the lining fat quarter (remembering to fold) but on the lining, DO NOT cut it off at 6 inches high, rather leave the rest of the fat quarter length uncut.
If you're adding any inside pocket/s, do so just after cutting.
- Cut your underskirt fabric by taking 6 inches off the top of your fq (fat quarter) and keep aside for embellishments if you want. In my example, this is the deep pink fabric.
I don't want to give you depth measurements as not all fat quarters are created equal (some are yards & some are metres and some are just plain dodgy)
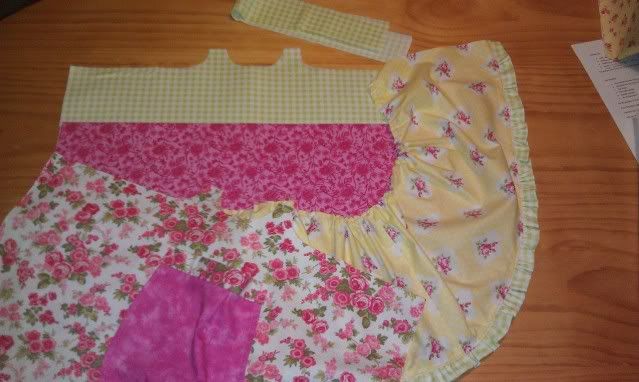
- Cut your skirt (yellow) in half, and sew it short sides together to make it twice as wide, then gather. (Also embellish however you like).
- So you should have the following pieces cut out (the things up the top are straps, and my white/floral lining has a pink pocket on it):
Ok let's get to the lining first:
- Fold the edges right sides together so you're looking at the shape just like when you cut out the template, but right sides together.
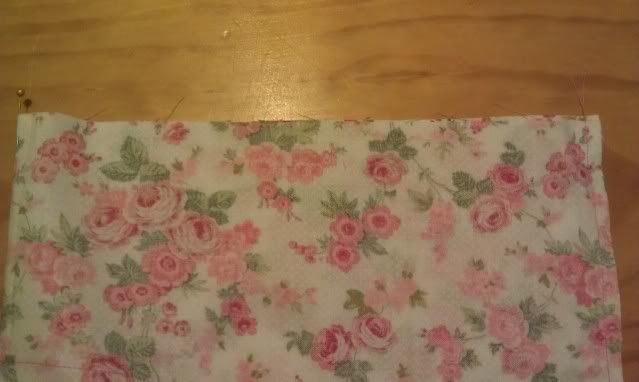
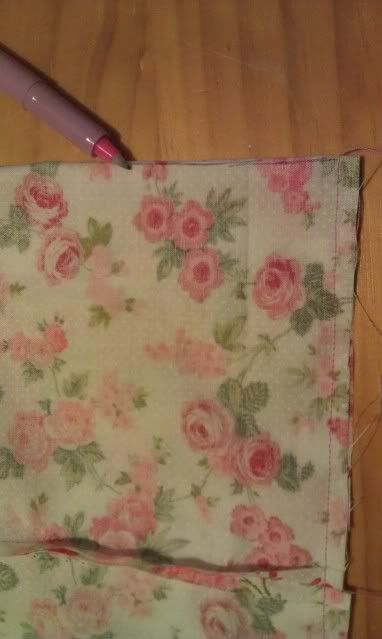
Sew the seam for the back, from top to bottom. Leaving open the shaped top and the flat edge at the bottom.
this is the view of the bottom edge, with the back seam sewn up.
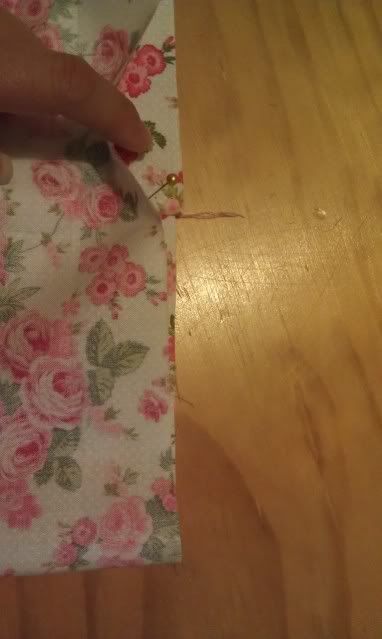
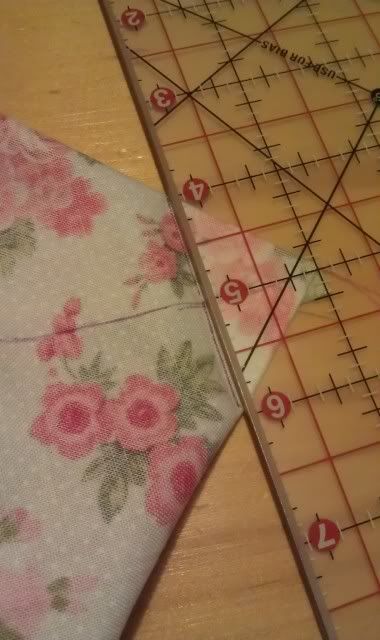
To find the centre, as above, place a pin in the end of the lining which doesn't have a seam in it.
Open up the bottom of the bag, and fold it so that the pin meets the seam. This is how you centre your back seam (so your outer and your lining match up).
- Now that you've centred the back seam: Sew the bottom shut.
Now we are making a boxy shape in the bottom of the bag. I'm trying to explain what is also shown here (If she makes more sense than I do).
- Mark a line on the folded edge of your bag corners, so you can squish the corner in a way that Ashley explains better here .
- Once you've 'squished' the corner, your sewn line (facing up) is matching/running-along the bottom seam underneath.
Make a mark 1 inch in, to sew along and create a box shape in the bottom of the bag.
- Sew across that line, repeat for other side, then put lining aside.
Now to the outer:
- Sew the top to the underskirt along the straight edge (right sides together, raw eges together). No photo.
- Iron on your heavyweight interfacing to the wrong side of your outer piece. No photo.
- Now we will sew the gathered skirt on, a little way down the underskirt. This gives a sash effect.
Due to a teeny tiny cutting mistake on my behalf I made the underskirt a wee bit shorter than I meant to, but I like the way it ended up.
Mark a line as I have done below, as a guide to pin your skirt on.
I thought an inch & a quarter would work, but then added another quarter for seam, seeing as I was pinning up against this line.
- Pin your skirt on right sides together, so that once your bag is upright, the raw edges are hidden.
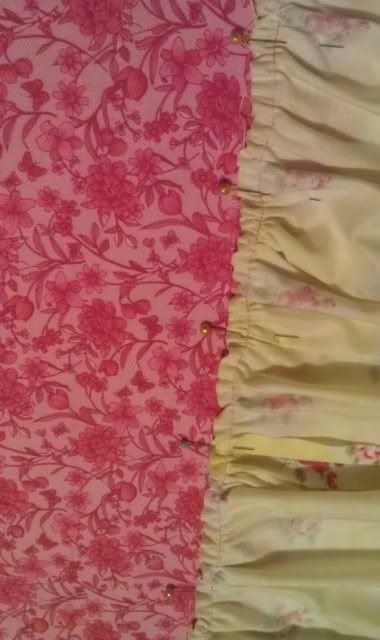
- Sew your back seam up on the skirt, as close as you can to the top.
- Sew your back seam up, being careful not to catch too much of the skirt in the seam (although I allowed a little, in order to be sure the dress had no raw edges, you will see when you make one).
- Attach straps inside as you would for any bag straps, but I made my front strap a little shorter to allow for the dress shape.
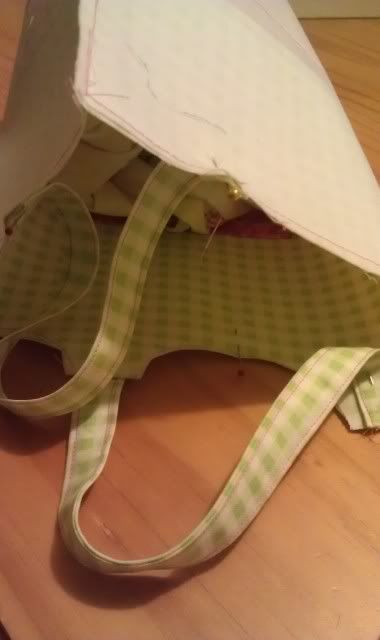
- Sew outer to inner as you would for a normal bag, and flip through. Here's mine before I topstitched the opening closed, gave it an iron, and attached a rosette:
this is a beauty, thank you so much for the tutorial
ReplyDeleteYou're welcome! Please send me a pic if you make one or any variation of it, Linda! Cass@cassthecoolest.com
DeleteCass, that is the cutest bag I have ever seen (and I've seen alot). Great work on the Tute. L xo
ReplyDeleteThat's so cute! I love the fabrics you used :)
ReplyDelete...and you're right you know... Cass IS the coolest!!! :D